Migration of Powerautomate and Canvas Apps
How to migrate PowerAutomate from one M365 tenant [Webfleet] to another M365 tenant [Bridgestone]
Before the migration date [20.06.2025], all your PowerAutomate flows must be exported from your source M365 tenant [Webfleet].
-
Sign in to Power Automate.
-
On the left navigation pane, select My Flows > Cloud flows, and then select the flow you want to export.
-
On the menu, select the down arrow next to Export, and then select Package (.zip).
-
On the next screen, enter a name and description for your package.
-
(Optional) Configure the package.
a. Under Review Package Content in the ACTION field, select Configure (the tool icon).
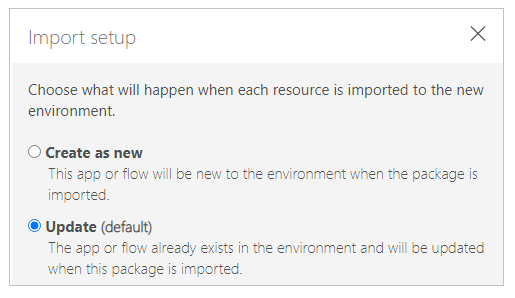
b. Select Update (default) or Create as new.
c. Select Save.
For a description of these options, go to the table in the Resources included in the package section with the following link.
-
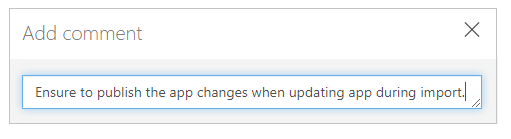
(Optional) Add a comment.
a. Under the Review Package Content heading in the ACTION field, select Comment (the speech balloon icon).
b. Enter your comment.
c. (Optional) You can view multiple lines in your comment by using the up and down arrows in the scroll bar. Alternatively, you can enlarge the field by selecting and dragging the diagonal lines on the lower right corner of the field.
d. Select Save. The icon in the ACTION column now contains quotation marks to indicate there’s a comment.
-
On the bottom right corner, select Export. Your package starts downloading shortly after. If your download doesn’t start automatically, select Download.
-
When you’re ready to import a flow, you’ll need the downloaded .zip file.
After the migration date [23.06.2025], all your PowerAutoamte flows must be imported and configured into your target M365 tenant [Bridgestone].
-
On the left navigation pane, select My Flows.
-
On the menu, select Import > Import Package (Legacy).
-
Select Upload > your zip file > Open.
-
The Upload button now reads Uploading, and the name of your .zip file appears to the left of the button. When the upload is complete, the package details appear.
-
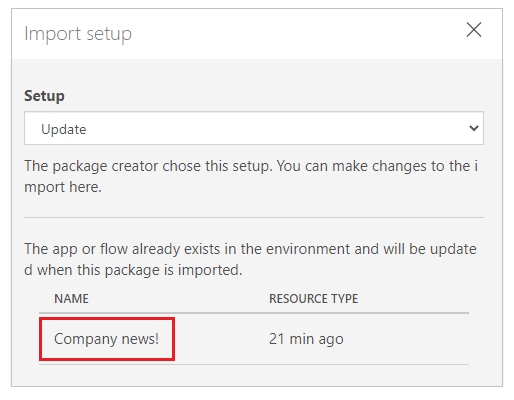
In the IMPORT SETUP column in the first row, select the content in the field, and then select Create as New or Update from the Setup dropdown menu.
For a description of the fields in the Setup menu, go to Resources included in the package with the following link.
-
Select Save.
-
Under Related Resources, do the following steps:
a. In the IMPORT SETUP column, select the contents of the field for each row.
b. In the Import setup dialog, select the item if it’s required to set up the flow to place a checkmark at the end of the row.
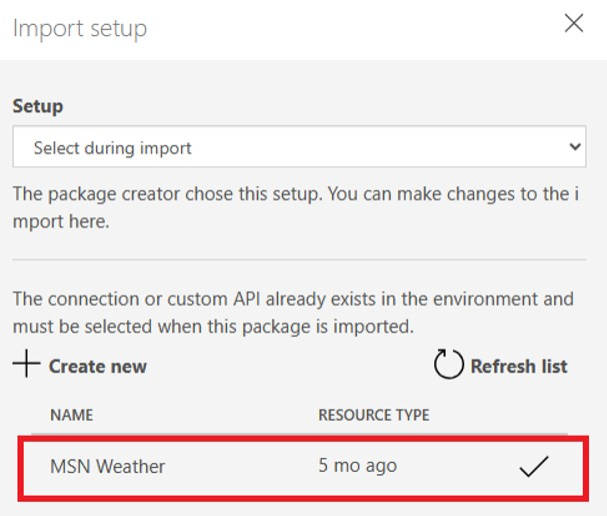
c. Select Save.
-
The Import button becomes active once you’ve successfully configured all the required settings. Select Import.
-
Test your imported PowerAutomate flows.
How to migrate canvas apps (PowerApps) from one M365 tenant [Webfleet] to another M365 tenant [Bridgestone]
Before the migration date [20.06.2025], all your canvas apps (PowerApps) must be exported from your source M365 tenant [Webfleet].
To export a canvas apps package, select your app, and then select Export Package.
You can change the default Import Action for each resource used by your canvas app. By default, resources in a canvas app package, including the app itself, are set to Update. However, you have the option to select Create as new during import, which will create the resource instead of updating an existing one. The import action you select will be the default action during the app import
To export a canvas app package
-
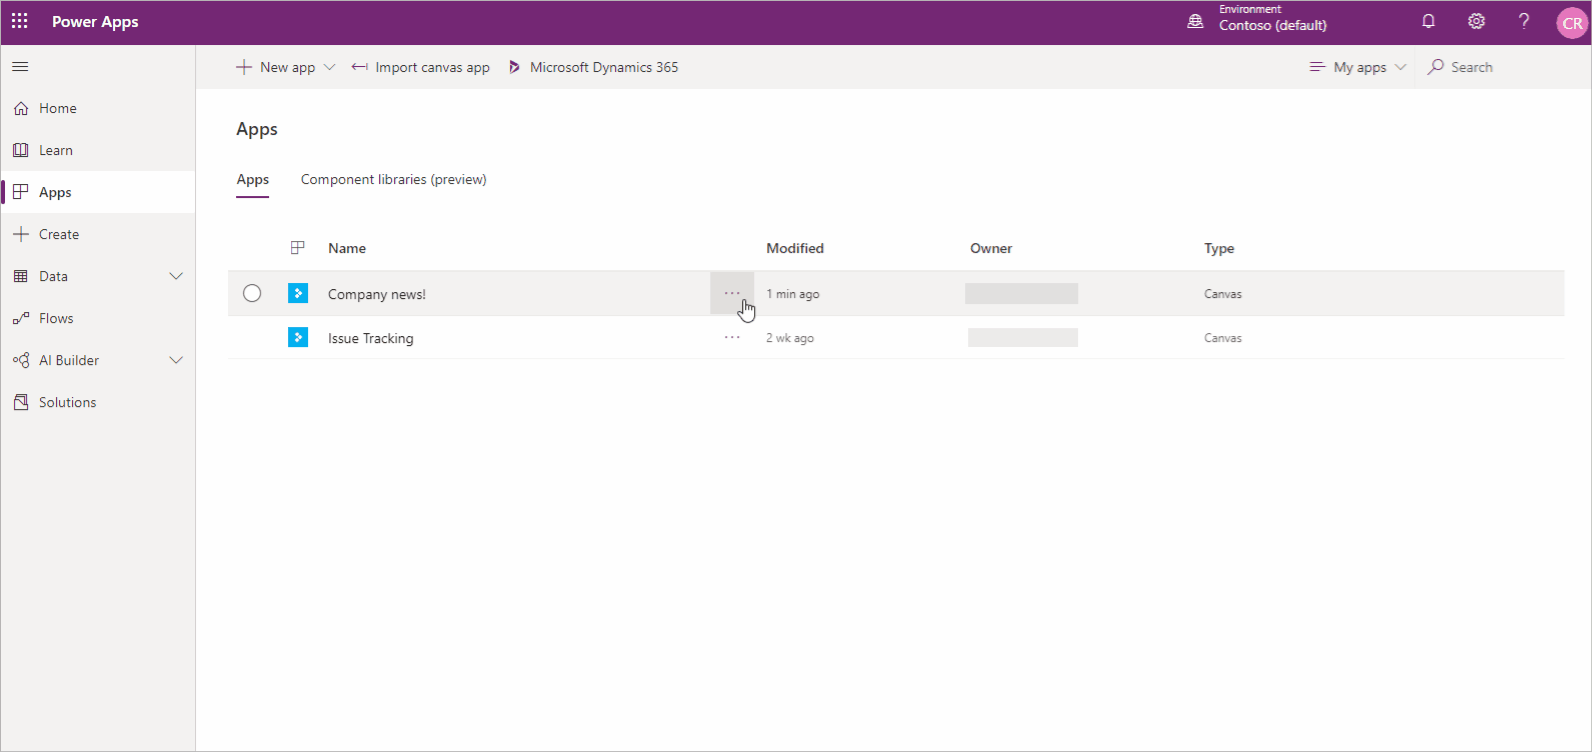
Sign in to Power Apps.
-
Select Apps from the left pane.
-
Select the app that you want to export.
-
Select Export Package.

- Enter the package Name and Description. You can also change the Environment name, if needed.
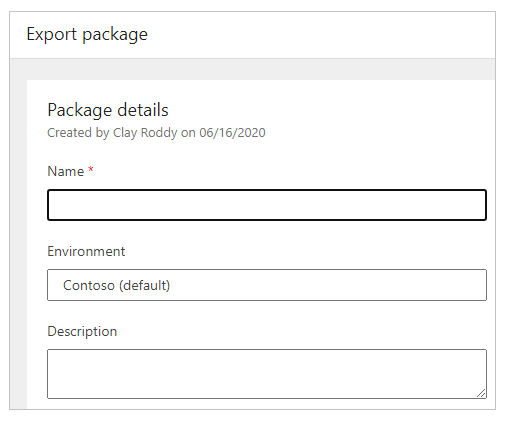
- Select Update to choose the import action for the app package resource.

- Select Create as new if the app should be created during import, or Update to update an existing app.
-
Repeat the previous step for each additional resource in the app package.
-
(Optional) Select Import comment icon. (comment icon) to insert a comment for each resource.
- Select Export to export the package.
The package is downloaded to your browser’s default downloads folder.
After the migration date [23.06.2025], all your canvas apps (PowerApps) must be imported and configured into your target M365 tenant [Bridgestone].
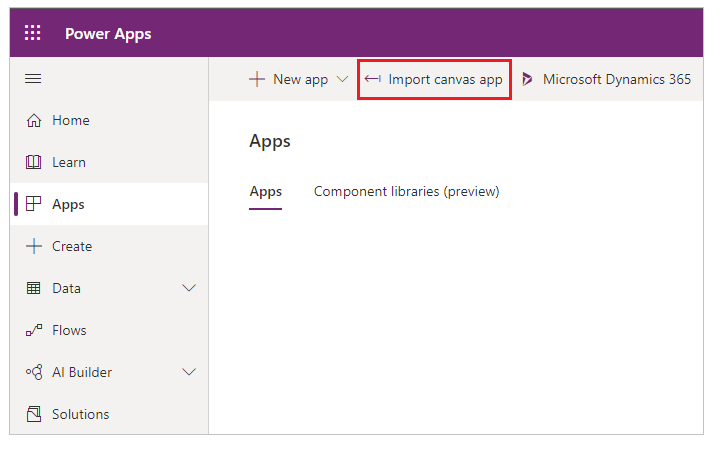
To import a canvas app package, select Import canvas app. Be sure to select the correct actions for each app package resource—for example, create a new instance of an app or a flow. You can also read additional information in comments that were entered while the app package was being exported.
If you’re updating an existing app or resource, be sure to publish the app so users can see the changes.
To import a canvas app package
-
Sign in to Power Apps.
-
Select Apps from the left pane.
-
Select Import canvas app.
-
Select Upload, and select the app package file that you want to import.
-
Select the Import Setup action, or Wrench icon. for a resource.

If you select Create as new, you can change the resource name.
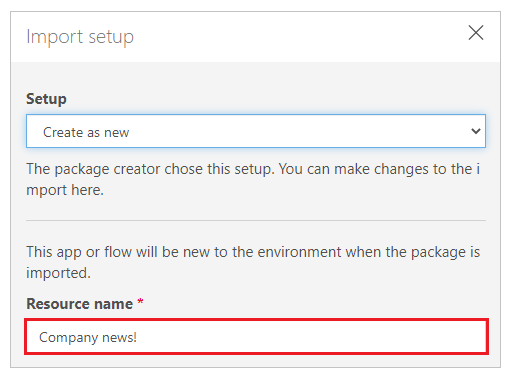
If you select Update, select an app that you want to update during the import.
-
Repeat the previous step for each additional resource in the app package.
-
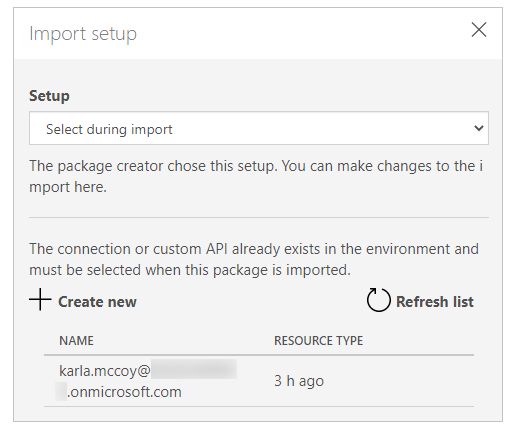
(Optional) If the app package contains references to connections, you can choose the connection from the available connections list.

Select Select during import to choose the appropriate connection.
- (Optional) If comments were entered for a resource during the export of the app package, the comment icon will appear filled and the text Comment yes will appear when you hover over it. Select the comment to view it.

- Select Import to import the app package.
Test your imported canvas apps (Power Apps).